Saturday, October 5, 2013

(Usually) Tortellini Soup


Fall has come, although we're having quite the Indian Summer here.  It was in the low 90s here today!  That said, I've been inside most of the day working on my sermon and doing laundry.  The glamorous life never ends!  I knew I needed something simple, filling, and super-tasty for supper, and if I could eat off of it for a few days, all the better.  I had been thinking about my tortellini soup and thought that would hit the spot so that's what I made.  Ok, ok, so I actually made raviolini soup since that's what I had, but you get the gist, y'all.


This soup is so simple and so good.  Tweak it to your liking.  It's very easy to make it vegetarian, and you can add some kind of meat to make it heartier.  It's a winner for your recipe repertoire.  I didn't have a recipe the first time I made it so I just threw together what looked and sounded good.  Baby spinach adds nutritional value and tastes great in the soup.  Sautéing the onion until it is translucent adds a lovely depth.  I like to add a handful of grated cheese so I try to keep the salt in the rest of the recipe to a minimum.  Want it spicy?  Crushed red pepper flake does the trick.  (I generally do a palmful.)

The best part?  It'll taste even better the next day as the flavors meld.  Nom nom nom.

Without further ado, here's the recipe for (Usually) Tortellini Soup:


  • 1 carton unsalted chicken or veggie stock (I like Kitchen Basics)
  • 1-14.5 oz can Italian style diced tomatoes (basil, garlic, oregano)
  • up to a 9 oz package of tortellini, raviolini, or other small stuffed pasta (I generally use cheese but will try some meat varieties as the weather cools, and I generally recommend using about 2/3 of the package so you have more broth.)
  • 1 palmful each dried basil, oregano, and crushed red pepper flake, adjusted to your taste preferences
  • 1 small onion, diced
  • 1 bag baby spinach, using as much as you'd like
  • 1 tbsp olive oil
  • 1 tsp salt, adjusted to your taste
  • grated cheese, if desired (I like parmigiano)
In a minimum 3 quart pot, saute the diced onion in the olive oil over medium heat until it is translucent.

Add the stock, then tomatoes, herbs, and crushed red pepper flake.  Give it a taste before adding the salt, then taste again after adding the salt to see if you need more.  Add the spinach to your liking, then cover and let simmer for 15 minutes.

Give the broth a taste again, adjusting your seasonings as necessary.  Add as much pasta as you'd like out of the package, then cover and let cook for the recommended cooking time on the package, generally 3-5 minutes.

Ladle into bowls and serve with the grated cheese on top.  Mangia!

Sunday, April 14, 2013

Learning To Love Brussels Sprouts

As a child, I did not like brussels sprouts.  Let me amend that statement: I would say that I hated them.  As the years have passed, my tastes have changed and expanded, including many foods that I had not thought I'd ever choose to eat, but I still thought, "Brussels sprouts-- yuck!"  Family and friends kept touting these miniature cabbages, over and over again, until I wondered if I might have them one day and actually find they were tasty.

As I shopped one day at Little House Green Grocery in Richmond, Virginia, I found myself in front of a stalk of incredibly fresh brussels sprouts.  They intrigued me and persuaded me to buy them so they could convert me to a sprout lover.  Oh, how glad I am that I did!

I first tried to roast them with garlic and olive oil, following Mark Bittman's recipe.  Things were proceeding perfectly until I checked on them and found them burnt!  My house smelled like failure...very tasty failure.  Encouraged by the few that emerged uncharred, I tried again and tasted success.  Needless to say, I now ask people how they like to fix these little guys so I can learn new tricks.  Thankfully, they are available in the produce section of many stores, washed and ready to steam, saute, roast, or whatever you prefer.  Trader Joe's even has them julienned for you.  Yum.

This is my most recent preparation: julienned and roasted with olive oil and bacon.  So easy.  So good.

Julienned Brussels Sprouts with Bacon

  • Fresh brussels sprouts (serving size is 4 per person as a side, but I do at least 8 if I'm making a meal out of them)
  • Olive oil
  • Bacon (I used the Trader Joe's precooked applewood smoked bacon to cut out on some of the fat and mess)
  • Salt and pepper to taste
If your brussels sprouts are not prewashed, wash and dry them well.  Preheat your oven to 425.

After cutting off the base, cut each sprout in half, then cut each half into thirds.  Set aside.  Chop your bacon into bite-sized pieces.  If you're not using precooked bacon, it will be easier to chop if it is colder, and make sure to use a different cutting board so there's no cross-contamination.  

Add about a tablespoon of olive oil to an overproof skillet.  I like to use a cast iron skillet, but if you do, make sure to watch the sprouts in the oven!  This is where I went wrong the first time.  Turn to medium-low and add the bacon to the pan.  When the bacon begins to sizzle, add your sprouts.  Season with salt and pepper to your liking.

Stir the sprouts and bacon so that they are evenly coated with the olive oil (and yummy bacon fat), then sauté until they're turning a nice, bright green.  Put the skillet in the oven, checking after about 8 minutes.  

Give them a stir, then cook for another couple of minutes until the bacon is crispy, and the sprouts have begun to brown.  Watch them carefully!  They're good crispy and brown, but if they're getting too dark, take them out.

I like to serve them in a bowl with a spoon so that I can scoop up every bit.  Oh, they're so good!

Vegetarian variation: substitute butter for half of the olive oil.  You can also add garlic, and I imagine shallots would be delicious in this.  You can drizzle with balsamic vinegar or toss with some parmesan cheese as well.  Enjoy!

Sunday, September 18, 2011

Potato Soup

Certain weather just calls for certain foods.  Today was cool and rainy, and I thought, "Aha!  Potato soup day."  It had been some time since I had made my potato soup, and I needed something warm, substantial, and comforting.  This fits that description nicely!  It's a pretty easy soup as well, and there's more than enough to share or freeze, making it a good company soup or make-ahead meal.  There are basics: potatoes (go figure), onion, a bit of butter, a bit of olive oil, some milk or cream, and cheese.  Other than that, you can play with it to your heart's content.

Have fun!

Potato Soup a la Anne Lane
- 1 medium yellow onion, diced
- about 6 Yukon Gold potatoes, each about the size of your fist (or my fist, since it's not that big), diced-- you can use them peeled or unpeeled, but I like them unpeeled
- 1 carton good chicken or veggie stock
- salt and pepper to taste
- 1 tbsp olive oil
- 1 tbsp butter
- 1- 8 oz. block good cheddar cheese, as sharp as you like it, chopped into small pieces (I use Cabot's Seriously Sharp White Cheddar-- yum)
- about 2 tbsp milk or cream
- bacon bits and extra cheese to top, if desired


In a Dutch oven or good sized pan (I used a 4 qt pan), heat the butter and olive oil over medium-low heat until the butter has melted and everything's bubbling.  Add the diced onion, sautéing until translucent.

Add a bit of your stock and deglaze the pan, scraping the pan with a nylon or silicone spatula or spoon to get the browned bits up into the stock.  Add the rest of the stock, then add your potatoes.

Season with some salt and pepper.  Don't go overboard as the flavors will concentrate.  Give the pot a good stir, then set your timer for 30 minutes and let the potatoes, onion, and stock cook so that the potatoes get tender.

When the potatoes are good and tender, use either a potato masher (for a chunkier texture) or an immersion blender (for a velvety texture) to get them to the consistency you prefer.  Swirl in your milk or cream and your cheese.  Stir and adjust seasonings.  Let this simmer for a couple of minutes to make sure the cheese melts, then give it a good stir to blend.

Serve in bowls with your preferred toppings.  I like some bacon and extra cheese personally.  This makes about 6 decent servings.

Enjoy!

Tuesday, September 6, 2011

Fresh Tomato Sauce a la Scarpetta and Smitten Kitchen

I have been richly blessed this summer to get an abundance of lovely fresh produce, both from people's garden and from various farmer's markets.  This has necessitated new and different ways to utilize the goodies!  The other day, Smitten Kitchen posted a fresh tomato sauce inspired by Scarpetta's Spaghetti with Tomato and Basil, a much-beloved dish.  It sounded heavenly!  I set out to make the stuff...

SK's recipe calls for plum tomatoes, as does Scott Conant's (Scarpetta is his baby).  I decided that I have seen such exquisite tomatoes around that I would use what I could get fresh here in my town.  This ended up being about half heirloom tomatoes and half plum tomatoes, both of which looked perfect!  I can tell you from the outcome that this dish is a keeper.  I melded SK's version with the Scott Conant versions I found online, tweaking to my liking.

You can do much of this ahead of time, refrigerating the unfinished sauce until you're ready.  It seems to me that you could get it two-thirds of the way finished and then freeze, but I haven't tried that yet.  In any case, the recipe quantities say that this makes 4 smallish portions.  If you're serving it for company, I'd recommend either using this as a true pasta course, or supplementing with a lovely salad.

Fresh Tomato Sauce a la Scarpetta and Smitten Kitchen:

  • 3 pounds fresh, ripe tomatoes (if using plum tomatoes, Conant says you'll have about 20)
  • 1/2 teaspoon kosher salt (This is lighter than the recipes I saw, but Conant recommends going lights as the salt will concentrate as the tomatoes cook.)
  • 1 large clove garlic, thinly sliced, or a couple of smaller ones, thinly sliced
  • Pinch of crushed red pepper flake
  • Small handful fresh basil leaves, with a couple of extras for garnish
  • 1/4 cup olive oil
  • 1/2 cup or so grated good quality parmigiano (Reggiano if you've got it, but I used an artisanal one that was nice, and it was shredded.  It was a little different in texture than the grated would have been, but still quite good.)
  • 1 tablespoon butter (or 2, if you're feeling like a richer sauce)
  • freshly cracked black pepper to finish
  • enough pasta for 4 servings (I used whole wheat spaghetti-- Ronzoni Healthy Harvest)
Bring a large pot of water to boil.  While waiting on this, take each tomato and cut a small "x" in the bottom.  When the water has come to a boil, immerse each tomato for 10-30 seconds (you should see the skin begin to crack), then either immerse it in a bowl of ice water or run it under very cold tap.  Peel the tomatoes, discarding the skins.  If you're cooking the sauce and pasta all in one fell swoop, Smitten Kitchen recommends keeping your pot of water to use for cooking the pasta later, which is an excellent way to save water.

Cut each tomato in half lengthwise, then get the seeds out.  I use a combination of squeezing gently, then scooping.  Do this over a strainer set in a small bowl so that you'll have the juices for the sauce.

Put your tomatoes and salt into a good-sized saucepan (non-reactive, of course).  You can either add the pasta to this later, which means you'll need a larger one, or later use a large skillet.  In any case, put the heat on medium-high and start breaking the tomatoes down.  Conant does this with a potato masher, but you can use an immersion blender or whatever tool you like, getting it as chunky or smooth as you like.

Bring the sauce to a boil, then turn the heat to medium-low, simmering for about 35-45 minutes.  If they need to be broken down more, now is the time.  Add some of your reserved tomato juices if the sauce starts to look too thick.  [If you're making the sauce ahead of time, I'd stop here after about 35 minutes of cooking.  Place your sauce into a container, then refrigerate until you're ready to finish.]

Add your garlic, most of the basil leaves,  and the red pepper flake (crushed in the palm of your hand to release more heat, and use more than a pinch if you want more heat) to the 1/4 cup of olive oil in a small saucepan.  Have your burner on the lowest possible setting so that the flavors slowly infuse into the olive oil as it comes to a simmer.  You should begin to smell everything a bit before it simmers.  Remove it from the heat as soon as it does.  Strain the oil into a vessel to use shortly.

[If you've prepared the sauce ahead of time, pull it out of the fridge now.] Boil water for your pasta, adding salt for flavor.  Once the water is boiling and the pasta has been added to the pot, I put the tomato sauce into a skillet on low heat, stirring occasionally.  Cook the pasta until it is al dente (or "very firm" as my package said), then drain it, reserving a half cup of cooking water.

When the sauce is your preferred thickness, add your flavored olive oil a bit at a time, checking for seasonings as you go.  Use as much or little of the olive oil as you prefer.  Add your pasta and 1/4 cup of the cooking water, tossing them together with tongs and cooking for 1-2 minutes.  Toss in the butter (if using), letting it completely incorporate into the sauce, then the cheese (if using).  Plate each portion, topping with some basil and some freshly cracked black pepper.

Enjoy!

Sunday, July 10, 2011

Taco Seasoning

I have long looked to tacos as a super-quick and comforting meal. Grab your chosen protein (beef, chicken, pork, turkey, or tofu), some taco shells, toppings, and a packet of taco seasoning. Done. Or so I thought.

Recently, my longtime friend Sarah told me how she and her family make their own taco seasoning. They control what goes into it, which means it is gluten-free and tweaked to their tastes. This intrigued me, but I had forgotten about it until I was wandering the aisles at the grocery store and found myself lingering in front of the taco fixins. I grabbed a pound of ground beef (93% lean and organic, as well as local), some Horizon organic Mexican cheese, and some soft taco shells, and I decided that I would make my own seasoning. I was salivating as I left the store!

I found a suitable recipe on AllRecipes.Com, and I read the comments for suggested tweaks. The original recipe is from Bill Echols. I tweaked it according to a couple of commentors' suggestions, and it was delicious!! Here is the recipe with my tweaks, as well as what I think I will do with it in the future.

Taco Seasoning:
  • -1 tablespoon chili powder
  • -1/4 teaspoon garlic powder
  • -1/4 teaspoon onion powder
  • -1/4 teaspoon crushed red pepper flakes (I think that next time, I will use 1/8 teaspoon of red pepper flakes and 1/8 teaspoon of chipotle pepper powder)
  • -1/4 teaspoon dried oregano
  • -1/2 teaspoon paprika
  • -1 1/2 teaspoons ground cumin
  • -1 teaspoon sea salt (I think you could use about a 1/2 to 3/4 teaspoon)
  • -1 teaspoon black pepper
  • -2 tablespoons cornstarch

Mix all ingredients together in a bowl (a small plastic container with a tight-fitting lid works well).

When you go to make your tacos, cook your protein, then add 3 tablespoons (approximately) of seasoning per pound along with a half cup of water, more if needed. Bring to a simmer and let everything reduce. Serve immediately. This should serve about 3 people, fewer if you're really hungry!

Play with this according to your liking, and please let me know what you come up with!

Monday, June 20, 2011

Blackberries

One of my very early memories is of drinking blackberry juice, purchased at Ukrops Supermarket in Richmond. It was absolutely delicious and one of the few healthy things I remember loving as a child, which is perhaps why my mom made sure we had it as often as we could. It disappeared from their shelves, but my taste for blackberries has remained, leading to such adventures as picking blackberries at summer camp-- to the dismay of the camp director, who worried that we would get bitten by snakes!

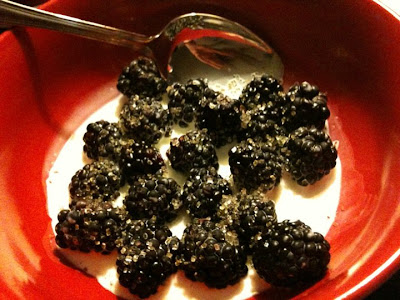
This week, I got some beautiful early blackberries from The Old Farm Truck Market and got to have some for dessert tonight. I had grand aspirations of cobbler but didn't have the patience to wait for them to bake. There would be those who would argue that the very fresh berries should be enjoyed in a purer state so that's what I did.

I washed the berries in a colander, placed them in a bowl, poured some heavy cream over them (not too much-- it should be a good marriage of cream and berries), and sprinkled a packet of turbinado sugar over them. Too good to be true! Get good berries and good cream (I used Organic Valley Heavy Whipping Cream), and you can't go wrong. Macerate the berries in a bit of dark rum if you're feeling adventurous, but they're great on their own. Yum!

Wednesday, June 8, 2011

Crispy Treats...with a Twist


(Confession time: this is not my photo, but it is a photo of the delectable treats as made by my friend and sorority sister Meg Hogan. Mine were all gone before I could get a picture!)

Since I was a child, I have had a deep and abiding love of marshmallow crispy treats. Do you remember the ad with the mom sitting in the kitchen, reading a romance novel as her family eagerly awaited their treats? She then provided them after sprinkling her face with flour and water to make it look as though she'd gone to gargantuan effort for this dessert. Needless to say, my school friends and I soon discovered that they were about the easiest thing to make and then made them all the time. It was then that I lost a desire to experiment with the recipe as I'd made them with too much marshmallow or too much butter or too much cereal, learning that there was a precious formula to be followed so that they would end up utterly perfect.

Fast forward to New Year's Eve of 2009. Thanks to one of my Facebook friends, I discovered the Smitten Kitchen blog and (most importantly) the recipe for browned butter crispy treats. After hearing that my friends mowed down on her stirring spoon like a bear gnawing on a leg, I knew I had to try them. They came with me to my New Year's party and went over amazingly well. I thought there should be no further tweaking of the crispy treat recipe after finding this delectable combination of salty and sweet, buttery and crispy.

Once again, fast forward, this time to this week in 2011. Meg posted the recipe for cake batter crispy treats from the How Sweet It Is blog, and once again, I was possessed to make them ASAP. Fortunately, Meg made them first and gave me her tips. I further tweaked it and now present you with the results. The ladies of my church raved, and I was thankful they ate most of them so I did not eat them until a) they were gone and b) I was sick to my stomach from all of the goodness.

Without further ado and with many thanks to Smitten Kitchen, How Sweet It Is, and Meg Hogan, I present to you salted brown butter-cake batter crispy treats. Make 'em for a gathering to share the love.

- 1 stick (6 tablespoons) butter (the SK recipe calls for unsalted, but I used to salted to add a bit more flavor, even though it really doesn't add that much)
- a pinch kosher salt
- 6 cups crisp rice cereal
- 1 10 ounce or 10.5 ounce bag mini-marshmallows (make sure they're fresh!)
- 1/3 cup cake mix (I went with Uncle Dunkie's yellow, largely because it was on sale)
- sprinkles

Begin by greasing a baking dish (I just use cooking spray). I use a rectangular Pyrex dish to get lots of thinner treats, but you can use a square one for thicker treats.

Place the butter and salt into a pot large enough to hold your marshmallow mixture and the 6 cups of cereal (probably at least 4 quarts to ensure stirring room). Let the butter melt on low. Keep stirring it as it browns, keeping an eye and a nose on it to tell when it's done. It will get brown and lovely and smell nutty. Yum.

SK tells you to turn your heat off at this point, but I like to keep my flame on low as I add the marshmallows since it helps them combine smoothly. Stir until it all looks smooth, then add the cake mix a little at a time, stirring to combine. Turn off the heat.

Add your cereal, making sure it all gets well-coated. Add half of your sprinkles, if you'd like sprinkles in your treats. If you add them while everything is too hot, they'll melt, but this can add fun color to the treats.

Spread the mixture into your greased dish, pressing down with either a greased spatula or greased hand to make sure they're even. Put sprinkles on top.

Mow down on what's left in the cooking pan as the ones in the dish cool. (Don't deny it!!) Share recipe as you wish.